The items that we are in need of are stringed musical instruments (acoustic guitars, electric guitars, ukuleles, violins, etc.). The instruments can be new or used. If they are used, they need to be in good condition.
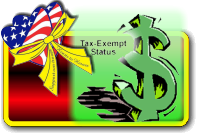
Monetary donations are also needed to help pay for the shipping costs and other items as needed. Hearts to Heroes, Inc., is a nonprofit 501(c)(3) Public Charity, your donation is tax deductible. If you would like to make a monetary donation, please make checks out to “Hearts to Heroes, Inc.” and mail to the attention of Myra Foskey; P. O. Box 711; Cochran, GA 31014 or you can make a donation here on our web site.
If you would like to donate a guitar or other stringed instrument for our “Guitars for the Troops Program,” or if you have any questions, please contact Myra Foskey at myra_foskey@yahoo.com.
Your help and support are greatly appreciated!